照明効果は、最大5つの光を使って照明効果を動画上に作成する動画編集ソフトAdobe Premiere Proの動画エフェクト『照明効果』の効果と使い方を解説します。
この記事の目次
Adobe CC/Premiere Proを格安で購入する方法
Adobe Creative CloudやPremiere Pro単体を安く契約する方法があるのをご存じでしょうか。ある裏技を使えば、すでに契約済みの場合でも最大46%が返金されます。詳しくは以下のAdobe CC/Premiere Proを格安で購入する方法の記事をごらんください。

この記事を書いた人:内村 航
株式会社ドウガテック代表取締役、京都芸術大学院卒(MFA)。2012年より『カンタン動画入門』を運営。動画編集ソフト・アプリのレビュー本数58本。動画編集スクール取材9校。アクションカメラ17台、α7 III、EOS8000D所有。大学講師(日本文理大学情報メディア学科、立命館アジア太平洋大学動画制作ワークショップ等)。著書:暮らしvlogのはじめ方(朝日新聞出版)、iMovieのマニュアル本(工学社 I・O BOOKS)。
→【セール】動画編集ソフトPowerDirector最大28%オフクーポンコード『dougatec2025』
→カンタン動画入門のYouTubeチャンネルを登録する(Click)
Adobe Premiere Pro関連記事
- ・Adobe Premiere Proを格安で購入する方法
- ・Adobe CCを格安で購入する方法
- ・Adobe Premiere Pro機能と料金
- ・編集の準備と、基本的なカット編集、書き出しの方法
- ・BGM音楽の挿入と音量調整 フェードイン・アウト
- ・テキストテロップ(タイトル)の挿入方法
- ・トランジションの挿入方法
- ・ピクチャインピクチャ・ワイプを作る方法
- ・グリーンバッククロマキーで背景を透過させる方法
- ・キーフレームの使い方
- ・ナレーション録音する方法
- ・Adobe公式の画像素材を使う方法
- ・Adobe公式の動画素材を使う方法
- ・動画エフェクトまとめ
- ・動画トランジションまとめ
照明効果の効果とは?
照明効果は、最大5つの光を使って照明効果を動画上に作成するエフェクトです。照明の色、光沢、質感など調整できます。

照明効果の使い方
照明効果は、エフェクトパネルの『色調補正』フォルダの中にあります。

照明効果をタイムラインの動画にドラッグ&ドロップしてください。
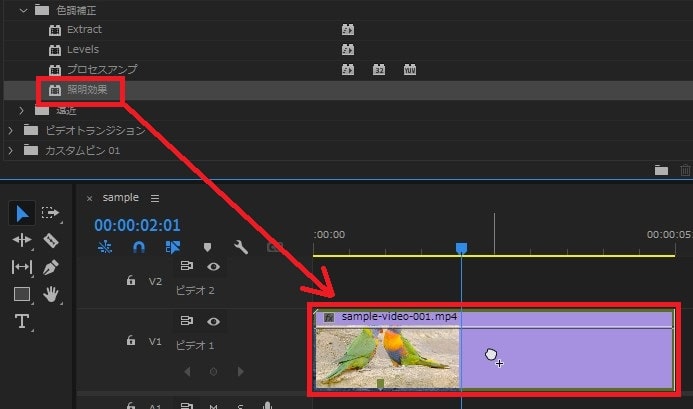
エフェクトコントロールに照明効果が表示されました。
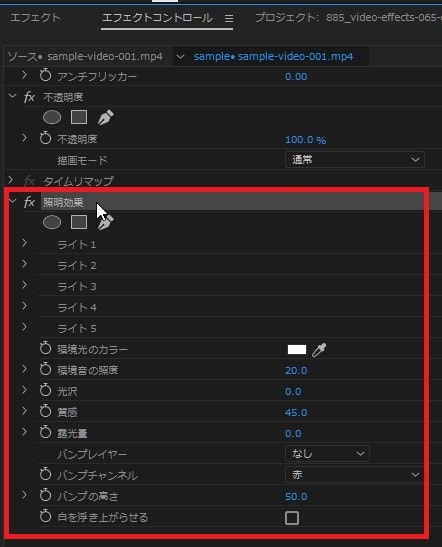
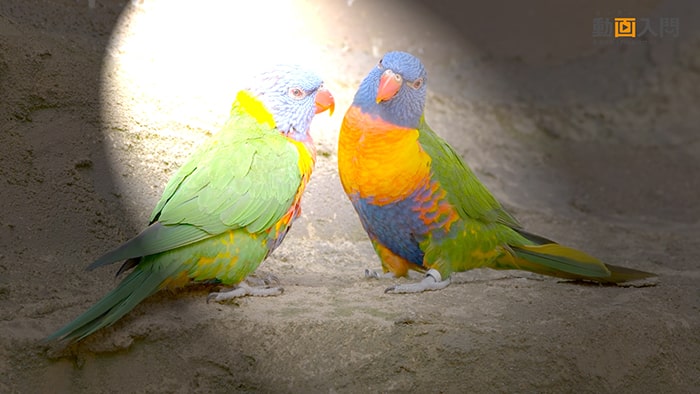
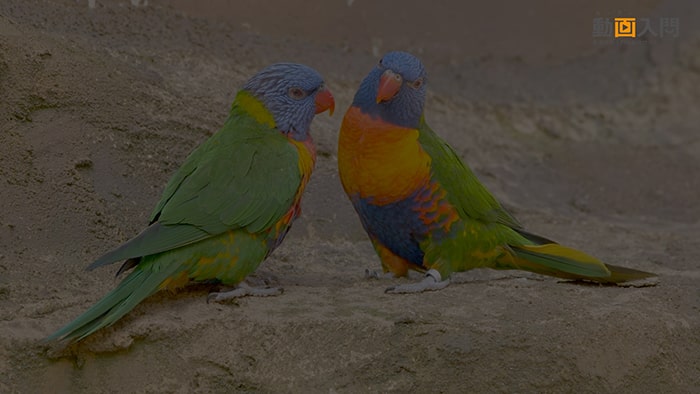
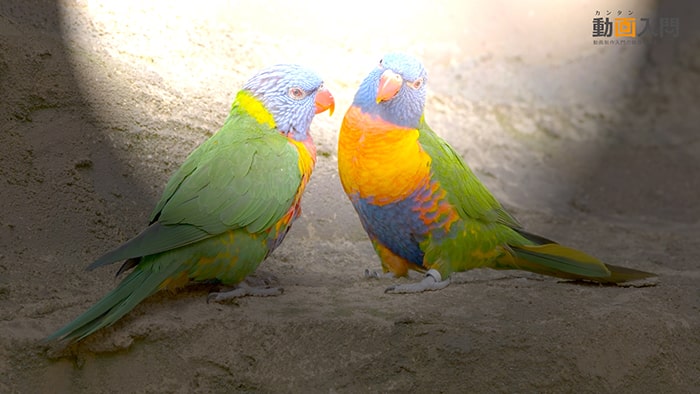
初期設定で動画上にスポットライトが表示されます。
照明効果の設定項目
照明効果には以下のような項目があります。
| ライト1~5 | 最大5つのライトを設定できる。 |
|---|---|
| ライトの種類 | ライトの種類を変更できる。『なし』『単一指向性』『全指向性』『スポットライト』の4種類。 |
| ライトのカラー | ライトのカラーを変更する。 |
| ライトの中心 | ライトの中心位置を変更する。 |
| 主半径/副半径 | ライトの主半径/副半径を変更する。数値は互いに連動する。 |
| 角度 | ライトの角度を変更する。 |
| 照度 | ライトの照度を変更する。 |
| 焦点 | ライトの焦点を変更する。 |
| 環境光のカラー | 環境光の色を変更する。 |
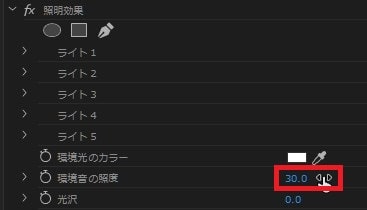
| 環境音の照度 | 環境音とあるが環境光の間違い? 照度を変更する。 |
| 光沢 | 光沢を変更する。 |
| 質感 | 質感を変更する。 |
| 露出量 | 露出量を変更する。 |
| バンプレイヤー | どのレイヤーに照明効果を付けるか変更する。 |
| バンプチャンネル | 『赤』『緑』『青』『アルファ』のどれかに変更する。 |
| バンプの高さ | バンプの高さを変更する。エンボスのような効果。 |
| 白を浮き上がらせる | エンボスのような効果。 |
照明効果のライトの設定を変更する方法
エフェクトコントロールの色調補正の『照明効果』の『ライト1』をクリックして開いてください。

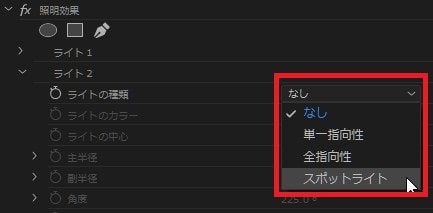
『ライトの種類』を変更してみましょう。
・なし
・単一指向性
・全指向性
・スポットライト
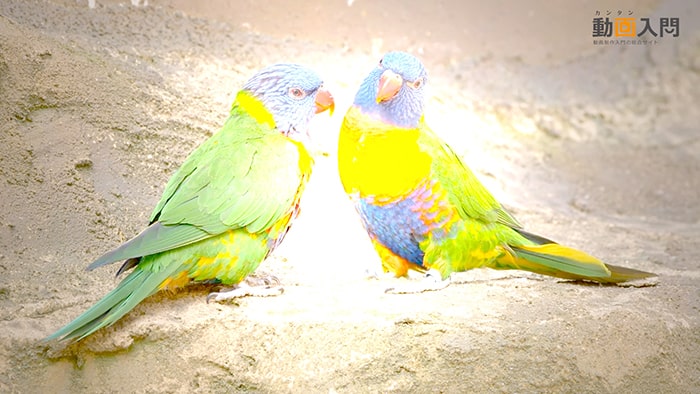
『ライトの中心』の数値を変更してください。
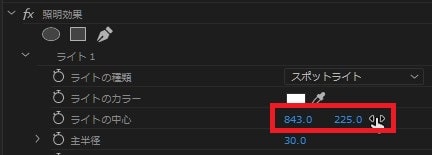
ライトの中心位置が変わりました。

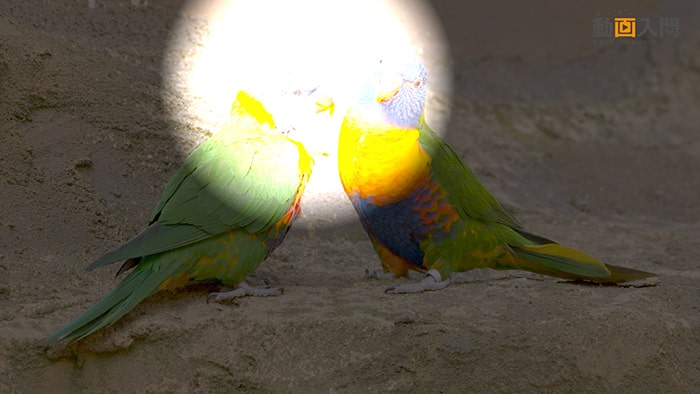
『主半径』『副半径』の数値を変更してください。この数値は互いに連動しています。
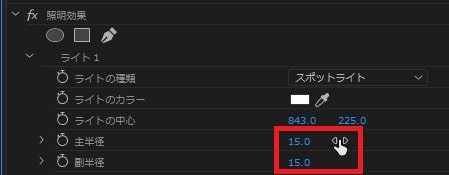
主半径、副半径が変化しました。
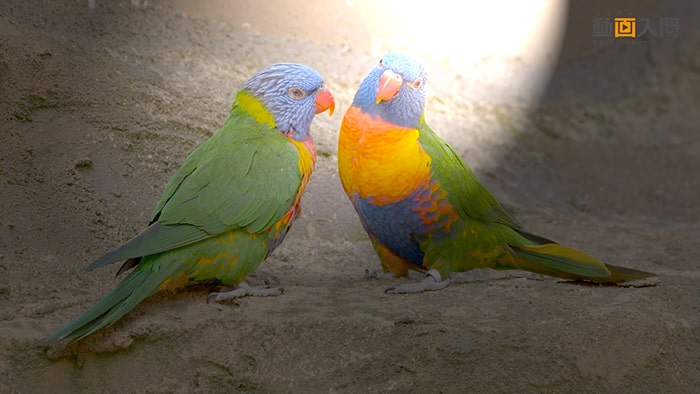
『角度』の数値を変更してください。
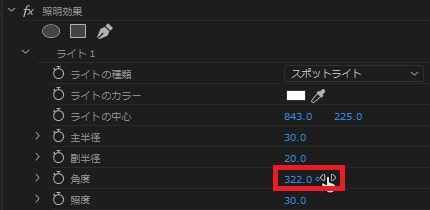
ライトの角度が変わりました。
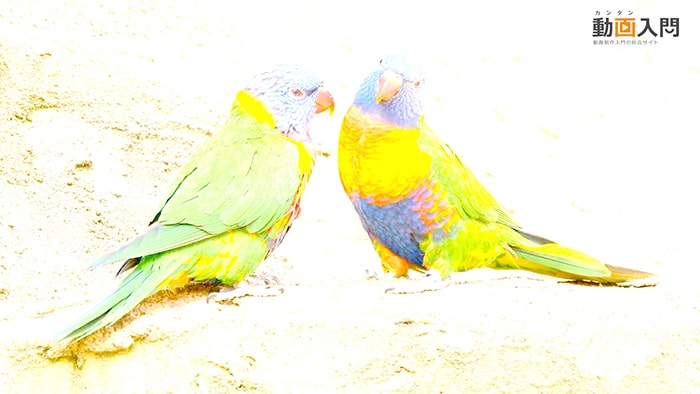
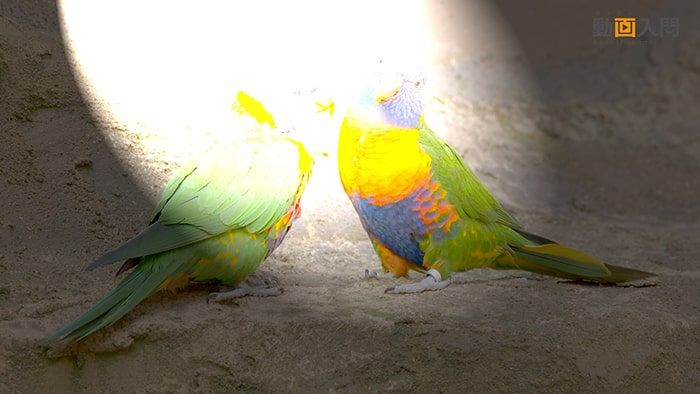
『照度』を変更してください。
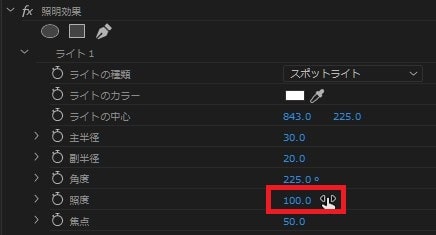
ライトの照度が変わりました。
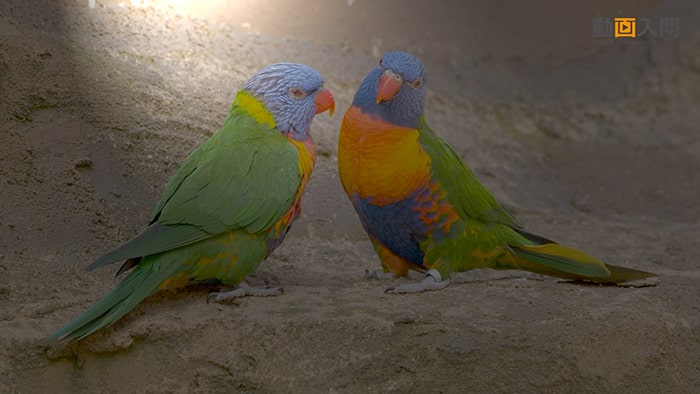
『焦点』を変更してください。

ライトの焦点が変わりました。
複数のライトを使う方法
最大5台までライトを使うことができます。
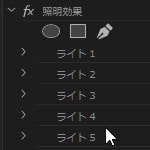
『ライト2』をクリックして設定項目を開いてください。
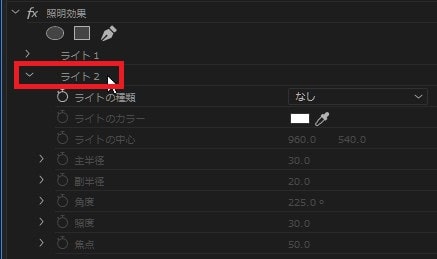
『ライトの種類』が初期では『なし』になっているので、それ以外を選択。
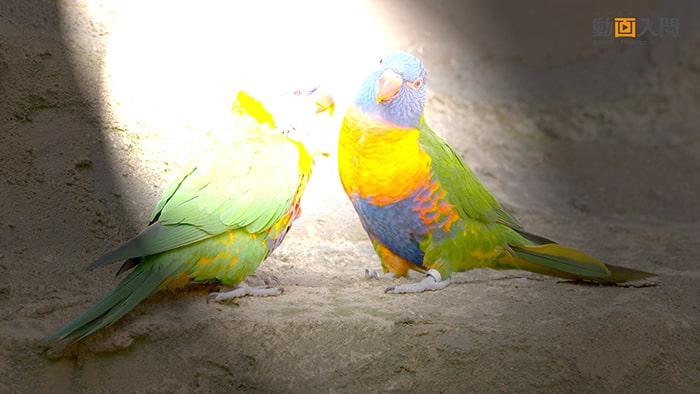
2つ目のライトが表示されました。
ライト2の設定を変更しましょう。
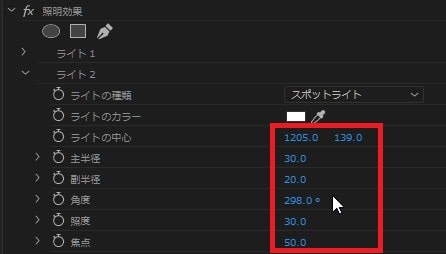
ライト2の位置を変更しました。
ライトを5つ適用させてみました。
照明の色を変更する方法
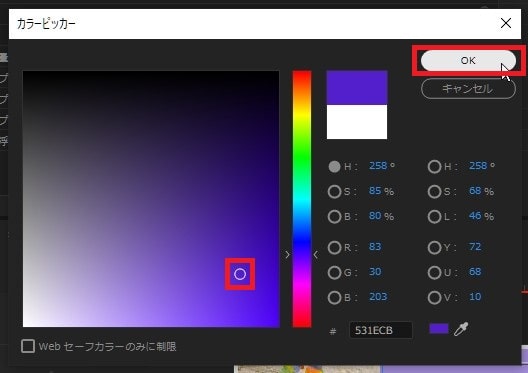
『環境光のカラー』のカラーピッカーをクリックしてください。

好きな色を選択し『OK』。
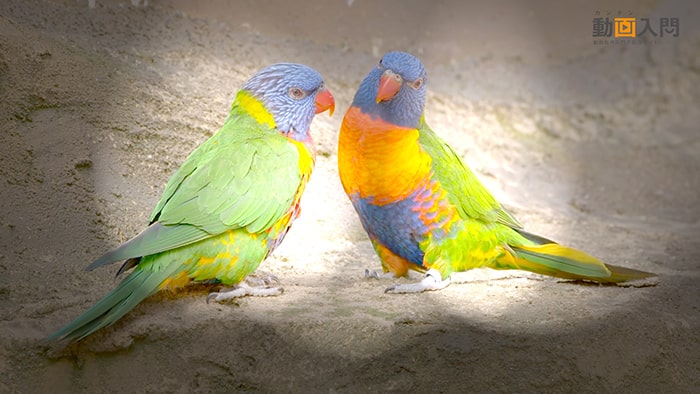
照明の色が変わりました。

照明のその他の設定を変更する方法
『環境音の照度』という項目がありますが、恐らく『環境光の照度』の間違いです。
この数値を変更すると、照明が当たっていない暗い部分の明るさを調整できます。
全体が明るくなりました。

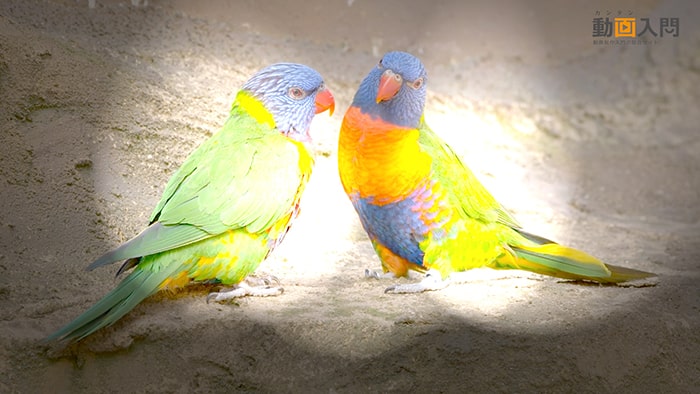
『光沢』の数値を変更してください。
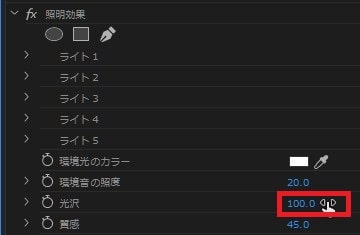
照明の明るさが変化しました。
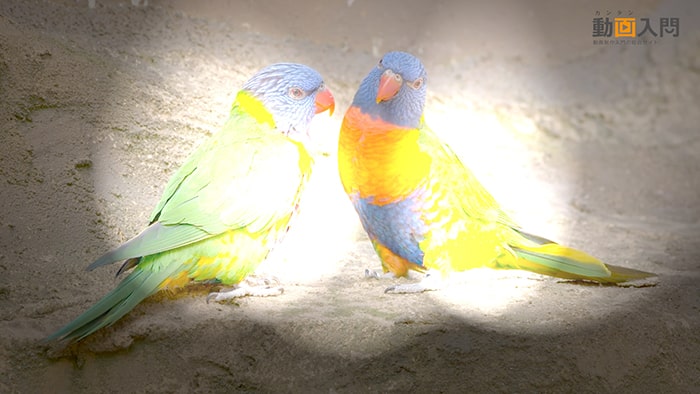
『質感』を変更してください。
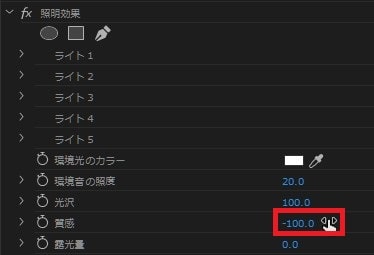
照明の質感が変わりました。
『露出量』を変更してください。

照明の露出量が変わりました。
照明効果の注意点
照明効果エフェクトは、設定項目が多いためなんとなくいじっていると迷って時間がかかってしまうことがあります。設定変更の前に、どんな照明効果にしたいかよく検討するようにしましょう。
【関連】Adobe Premiere Pro動画エフェクトの効果・使い方まとめ動画編集スクールでPremiere Proを学ぶ方法
Premiere Proは独学でも学ぶことができます。しかし動画編集で副業やフリーランス、映像制作会社への転職・就職を目指している方は動画編集スクールに通うことをおすすめします。
動画編集スクールではPremiere Proだけでなく、高度なアニメーション・モーショングラフィックソフトのAfter EffectsやPhotoShop、Illustratorの使い方から、案件の受け方や就職転職支援などを受けることができます。
詳しくは動画編集スクールのまとめ記事を参考にしてください。